Ribs to the Rescue

 
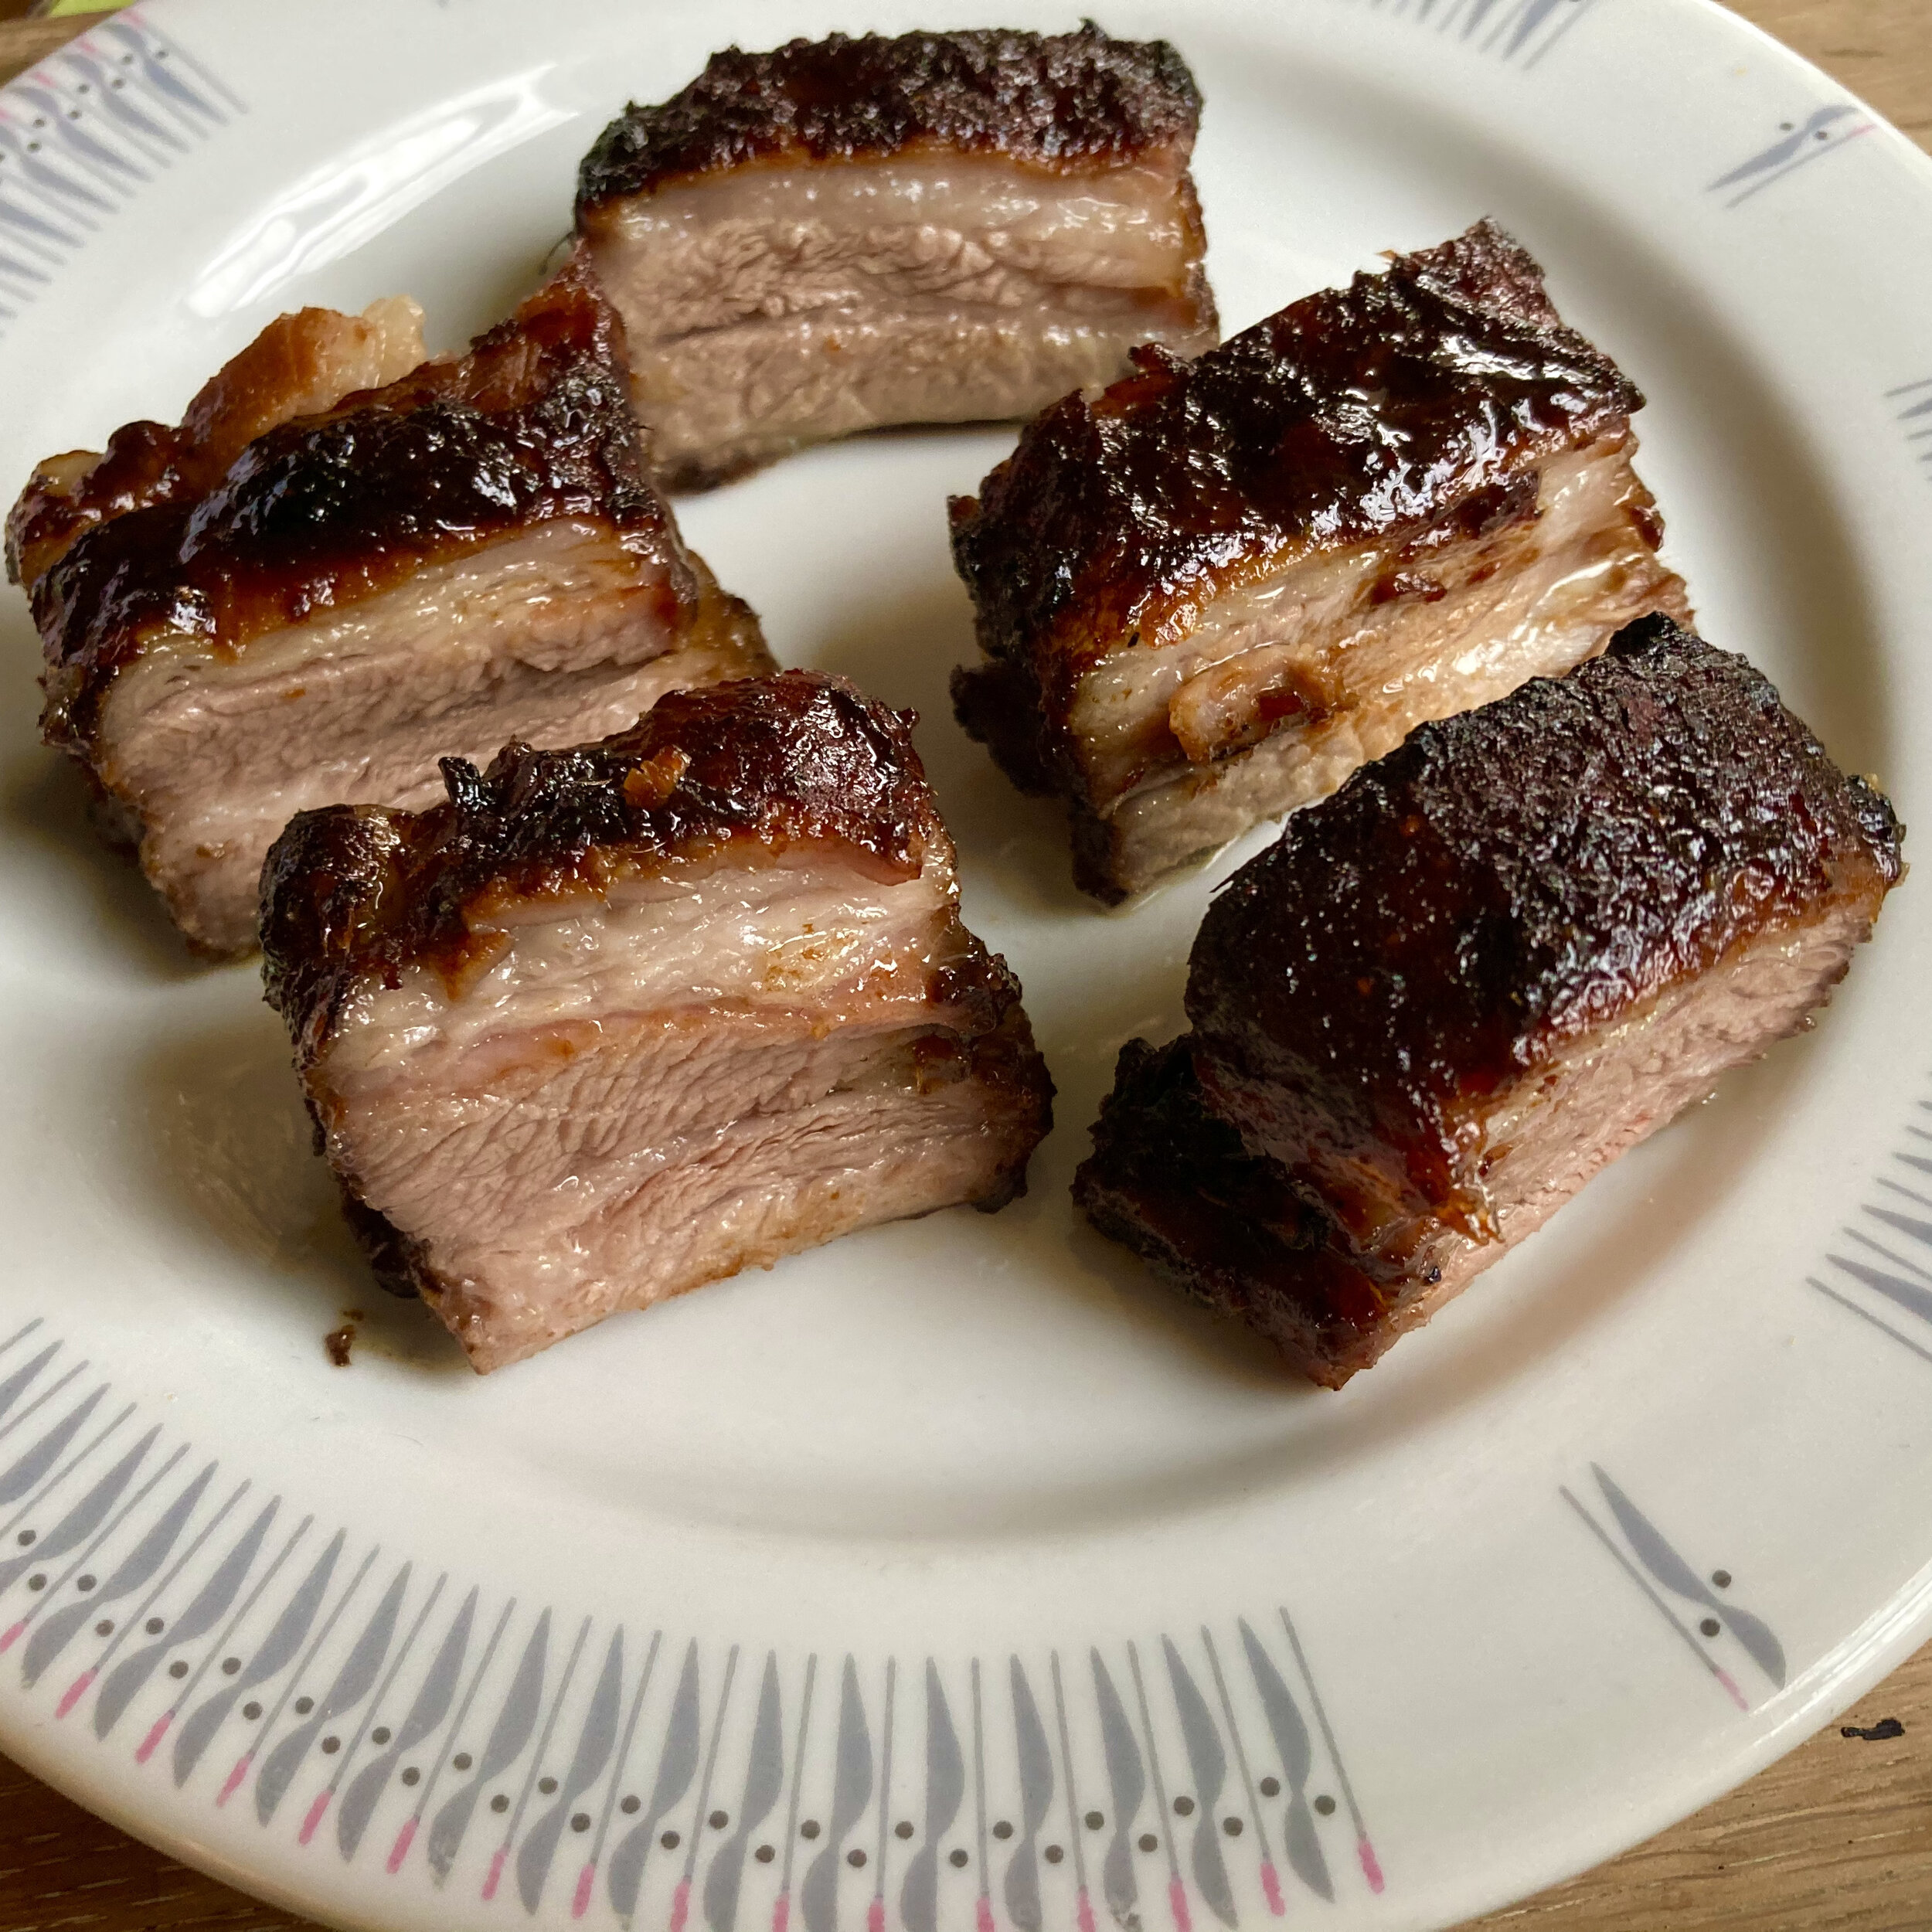
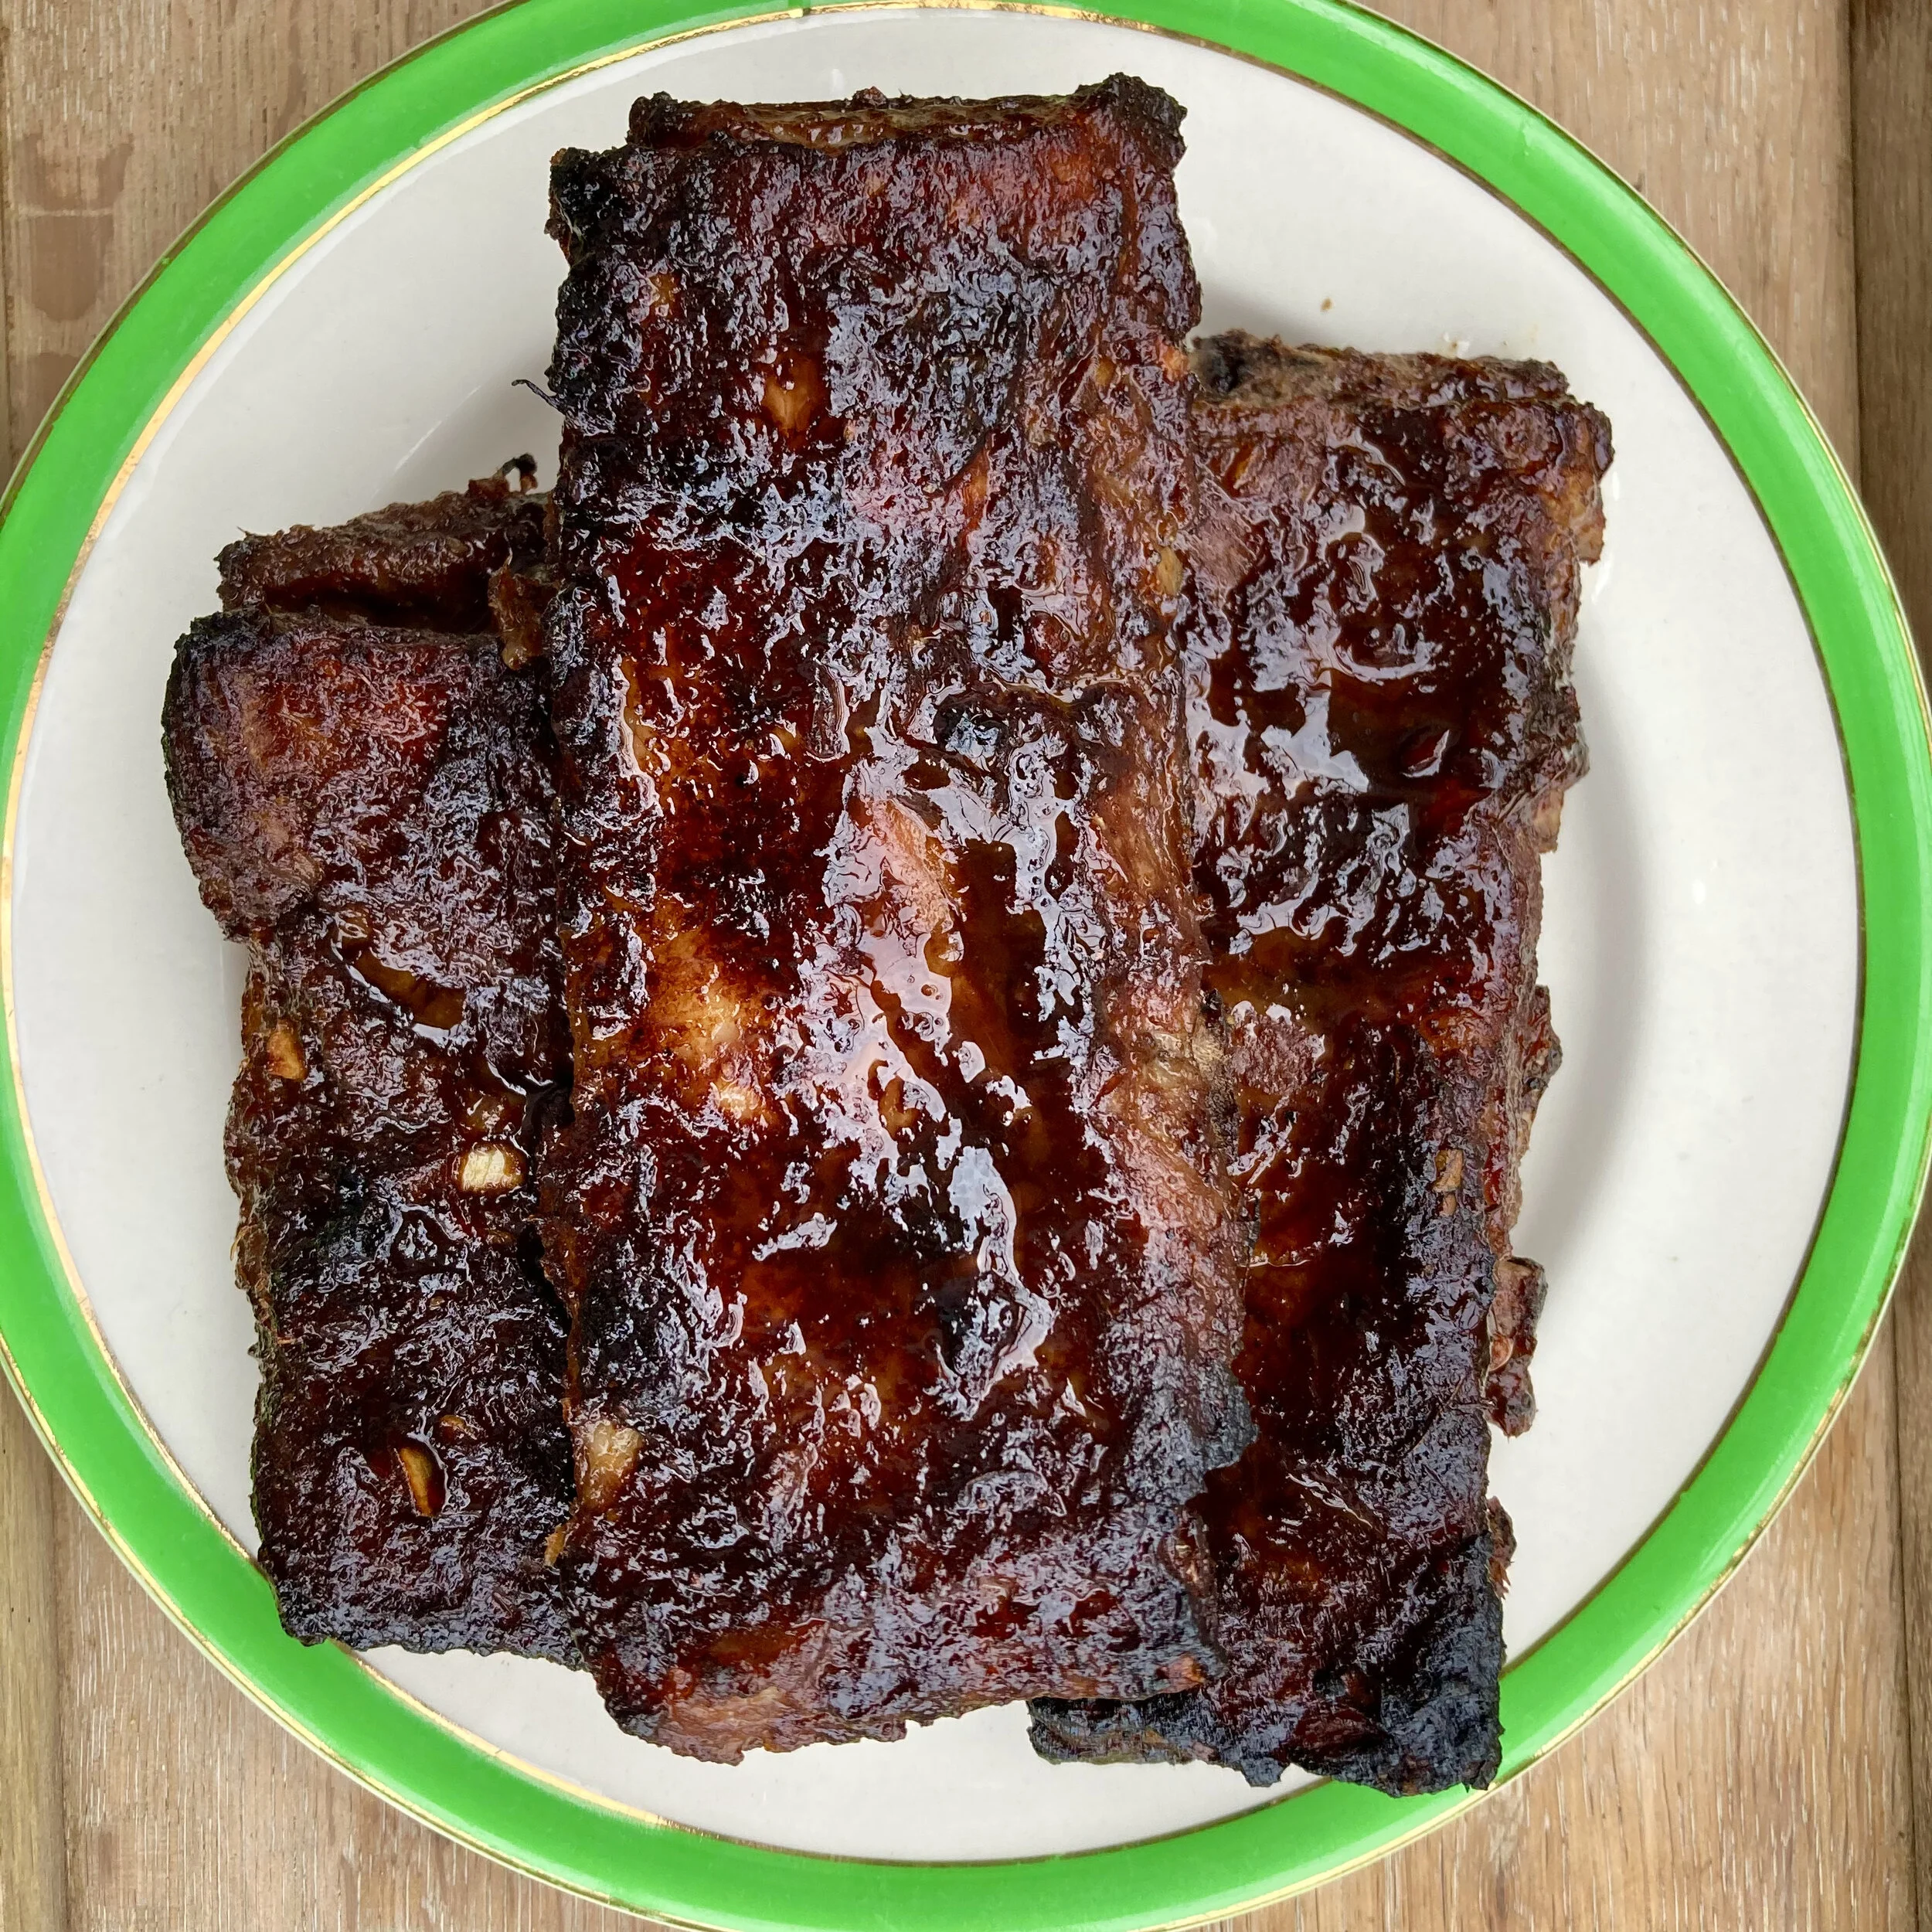
fig. a:  Thai-style ribs

fig. a: Thai-style ribs

fig. b:  Thai-style riblets (a.k.a., where the ice-cold beers at?)

fig. b: Thai-style riblets (a.k.a., where the ice-cold beers at?)

Four score and seven years ago

These are the times that try men’s souls

There comes a time in every nordique grill fanatic’s life

There comes a time every winter, usually around February or March, when—in the words of the late, great Charlie Feathers—I can’t hardly stand it.  

I’m crazy about grilling and smoking.  I love cooking over a live fire.  But my circumstances are such that doing so is pretty much impossible for several months of the year.  A big part of the reason why is just climate, but the deciding factor is definitely living situation.  Even if I wanted to brave the elements to do some winter grilling, my premises don’t allow it.  I’m sure I’m not the only one.  I’m sure there are plenty of you out there who understand my predicament and feel my pain.

In any case, come February or March (sometimes even earlier), the proverbial thrill of the grill really starts gnawing at me, and that’s usually around the time that I respond with one of my oven-roasted spare ribs recipes.  It’s never quite the same as smoking them over a live charcoal fire, of course, but buy some nice meaty racks, coat them with a tasty rub, slather them with a wicked BBQ sauce, roast them real slow & low, and serve them with a little BBQ dip, and those ribs are as close an approximation of the pleasures of the grill as I’m likely to find until The Thaw occurs.

This year when that urge hit me I came across a recipe in the New York Times for oven-roasted ribs that was rather different than the Southern-style ribs I usually make, and I found myself entranced by what I read.  The recipe was David Tanis’s riff on a Thai barbecued spare ribs recipe that first appeared in Andy Ricker’s Pok Pok cookbook back in 2013.  

When Tanis’s version was first published in the summer of 2017, it was introduced as a recipe that was perfect for a scorching summer day.  One of those days that’s so oppressively hot that you certainly don’t want to do a lot of cooking, and any cooking you end up doing needs to be easy.  In this case, the idea goes as follows: having picked up some racks from your butcher and gotten her to saw them in half lengthwise, you marinate your ribs for a couple of hours, pop them into a low-temperature oven, retreat to an air-conditioned room (or the coolest room you’ve got) with a  cold drink. Flip the ribs a couple of times (every 30 minutes or so), and an hour and a half later, your ribs are nearly done.  Raise the heat in the oven briefly, paint them with your sauce, and ten to fifteen minutes later you’ll be rewarded with gorgeously lacquered Thai-style spare ribs—utterly “irresistible finger food,” as Tanis puts it.

Well, it turns out this recipe is equally good in the wintertime.  In fact, it might even be better.  I don’t know about you, but when it’s really, really hot, I’m not sure I want the oven on for two hours at all, even if it’s set at a low temperature.  When it’s really, really hot usually all I want is salad, or conservas, or cold noodles.  But in the doldrums of winter, when I can’t wait to get back on the grill, but I know that possibility is still weeks away?  This recipe was truly phenomenal.  It also proved to be highly versatile.  I made sure to make plenty so that we’d have leftovers, and I ended up serving those leftovers a couple of different ways.  More on that later, but for the moment let me just add one last ironic detail to this story:  Tanis devised this as an oven-roasted recipe quite specifically because he didn’t want to grill outside—because it was too hot, and he’d already had a few occasions that summer where he’d decided to grill on a particularly hot summer day, only to regret it later.  Needless to say, this is not a problem we’re experiencing right now here in Montreal.

Beyond the fact that it lent itself to oven-roasting, Tanis was originally drawn to the recipe because of its simplicity and its lack of pretence, and because of Ricker’s stubborn insistence that his ribs should be cooked relatively quickly.  “Not falling-off-the-bone tender!”, Ricker emphasized.  As Tanis explains this approach is the preference in Thailand.  “Thai diners prefer ribs on the chewy side, with a little tasty, crunchy cartilage or gristle in the bargain.”  Among other things, this means these ribs are quicker and easier to prepare than recipes that are ultra-slow & low.

The only thing that takes a little extra forethought is the marination phase.  Following Ricker, Tanis recommends a minimum of two hours’ time for the ribs to get the benefits of their tantalizingly sweet and funky marinade.  If you can marinate the ribs longer—a few hours, or even overnight—they’ll be even better.

And it was with the marinade that Tanis took just a couple of liberties:  adding tamarind paste to offset the honey and up the funk factor, and a bit of extra chili to give the ribs a more pronounced kick.  Ricker’s original recipe is Chinese-influenced.  You’ll know what I’m talking about when you taste them.  Tanis’s alterations—minor thought they may be—may not be 100% authentic (there’s a reason his recipe is titled “Thai-Style Spare Ribs”)—but they have the effect of making the ribs even more savoury, even more intoxicating, and somehow even more “Southeast Asian.”

As Tanis points out, the resulting ribs are so lip-smackingly delicious that they don’t require an additional dipping sauce when you serve them.  But if you choose to whip one up—especially a spicy, garlicky Thai or Southeast Asian number—you won’t be disappointed.  Quite the opposite.

Thai-Style Spare Ribs

2 racks of baby back ribs, 3 to 4 pounds, halved lengthwise to make 3-inch ribs (ask your butcher to do this)

2 tsp kosher salt

3 tbsp honey

2 tbsp soy sauce

1 tbsp tamarind paste

1 tsp toasted sesame oil

2 garlic cloves, minced

2 tbsp grated ginger

½ tsp crushed red pepper (preferably Thai)

½ tsp black pepper

¼ tsp cinnamon (preferably Vietnamese)

pinch of grated nutmeg

pinch of cayenne

2 tbsp Shaoxing cooking wine, mirin or sherry (I used mirin)

3 tbsp chopped garlic chives or scallions, for garnish

3 tbsp chopped cilantro leaves and tender stems, for garnish

Lay the ribs flat in a roasting pan, meaty side up. You will have 4 long pieces. Season lightly with salt on both sides.

Make the marinade: in a small bowl, combine honey, soy sauce, tamarind paste, sesame oil, garlic, ginger, red pepper, black pepper, cinnamon, nutmeg and cayenne. Add the wine and 1/4 cup hot water and whisk well.

Pour marinade over ribs to completely coat. Marinate at room temperature for 2 hours, turning once or twice, or cover and refrigerate for several hours or overnight, making sure to turn the ribs at least once or twice.  (If you choose to marinate the ribs slowly in the refrigerator, just make sure to pull them out to temper them at least one hour (and preferably two) before roasting them.

Position a rack in the middle of the oven and heat to 250º F. Transfer the roasting pan, uncovered, to the rack. Roast ribs for 1 1/2 hours, basting with pan juices and turning ribs over every 20 minutes or so. If pan juices seem to be drying out or burning, add a little water to the pan.

Pour juices from the roasting pan into a small saucepan. Spoon off fat from surface of sauce, then simmer sauce for a few minutes until slightly thickened, then use the juices to paint the ribs. 

Turn up oven the heat to 400º F. Return ribs to oven for 10 to 15 minutes, until nicely glazed.

Use a sharp knife to divide ribs, cutting between the bones. Pile ribs onto a platter, sprinkle with garlic chives and cilantro, and serve.


According to Ricker, “these ribs are often served in Thailand to accompany ice-cold beer,” as Tanis notes. Did you catch that? They’re a snack meant to accompany beer. The ice-cold beer is primary. The ribs are just an accompanying snack. Like salted peanuts. All I know is these ribs can be eaten as a snack or appetizer, and they are fantastic with especially cold beers.

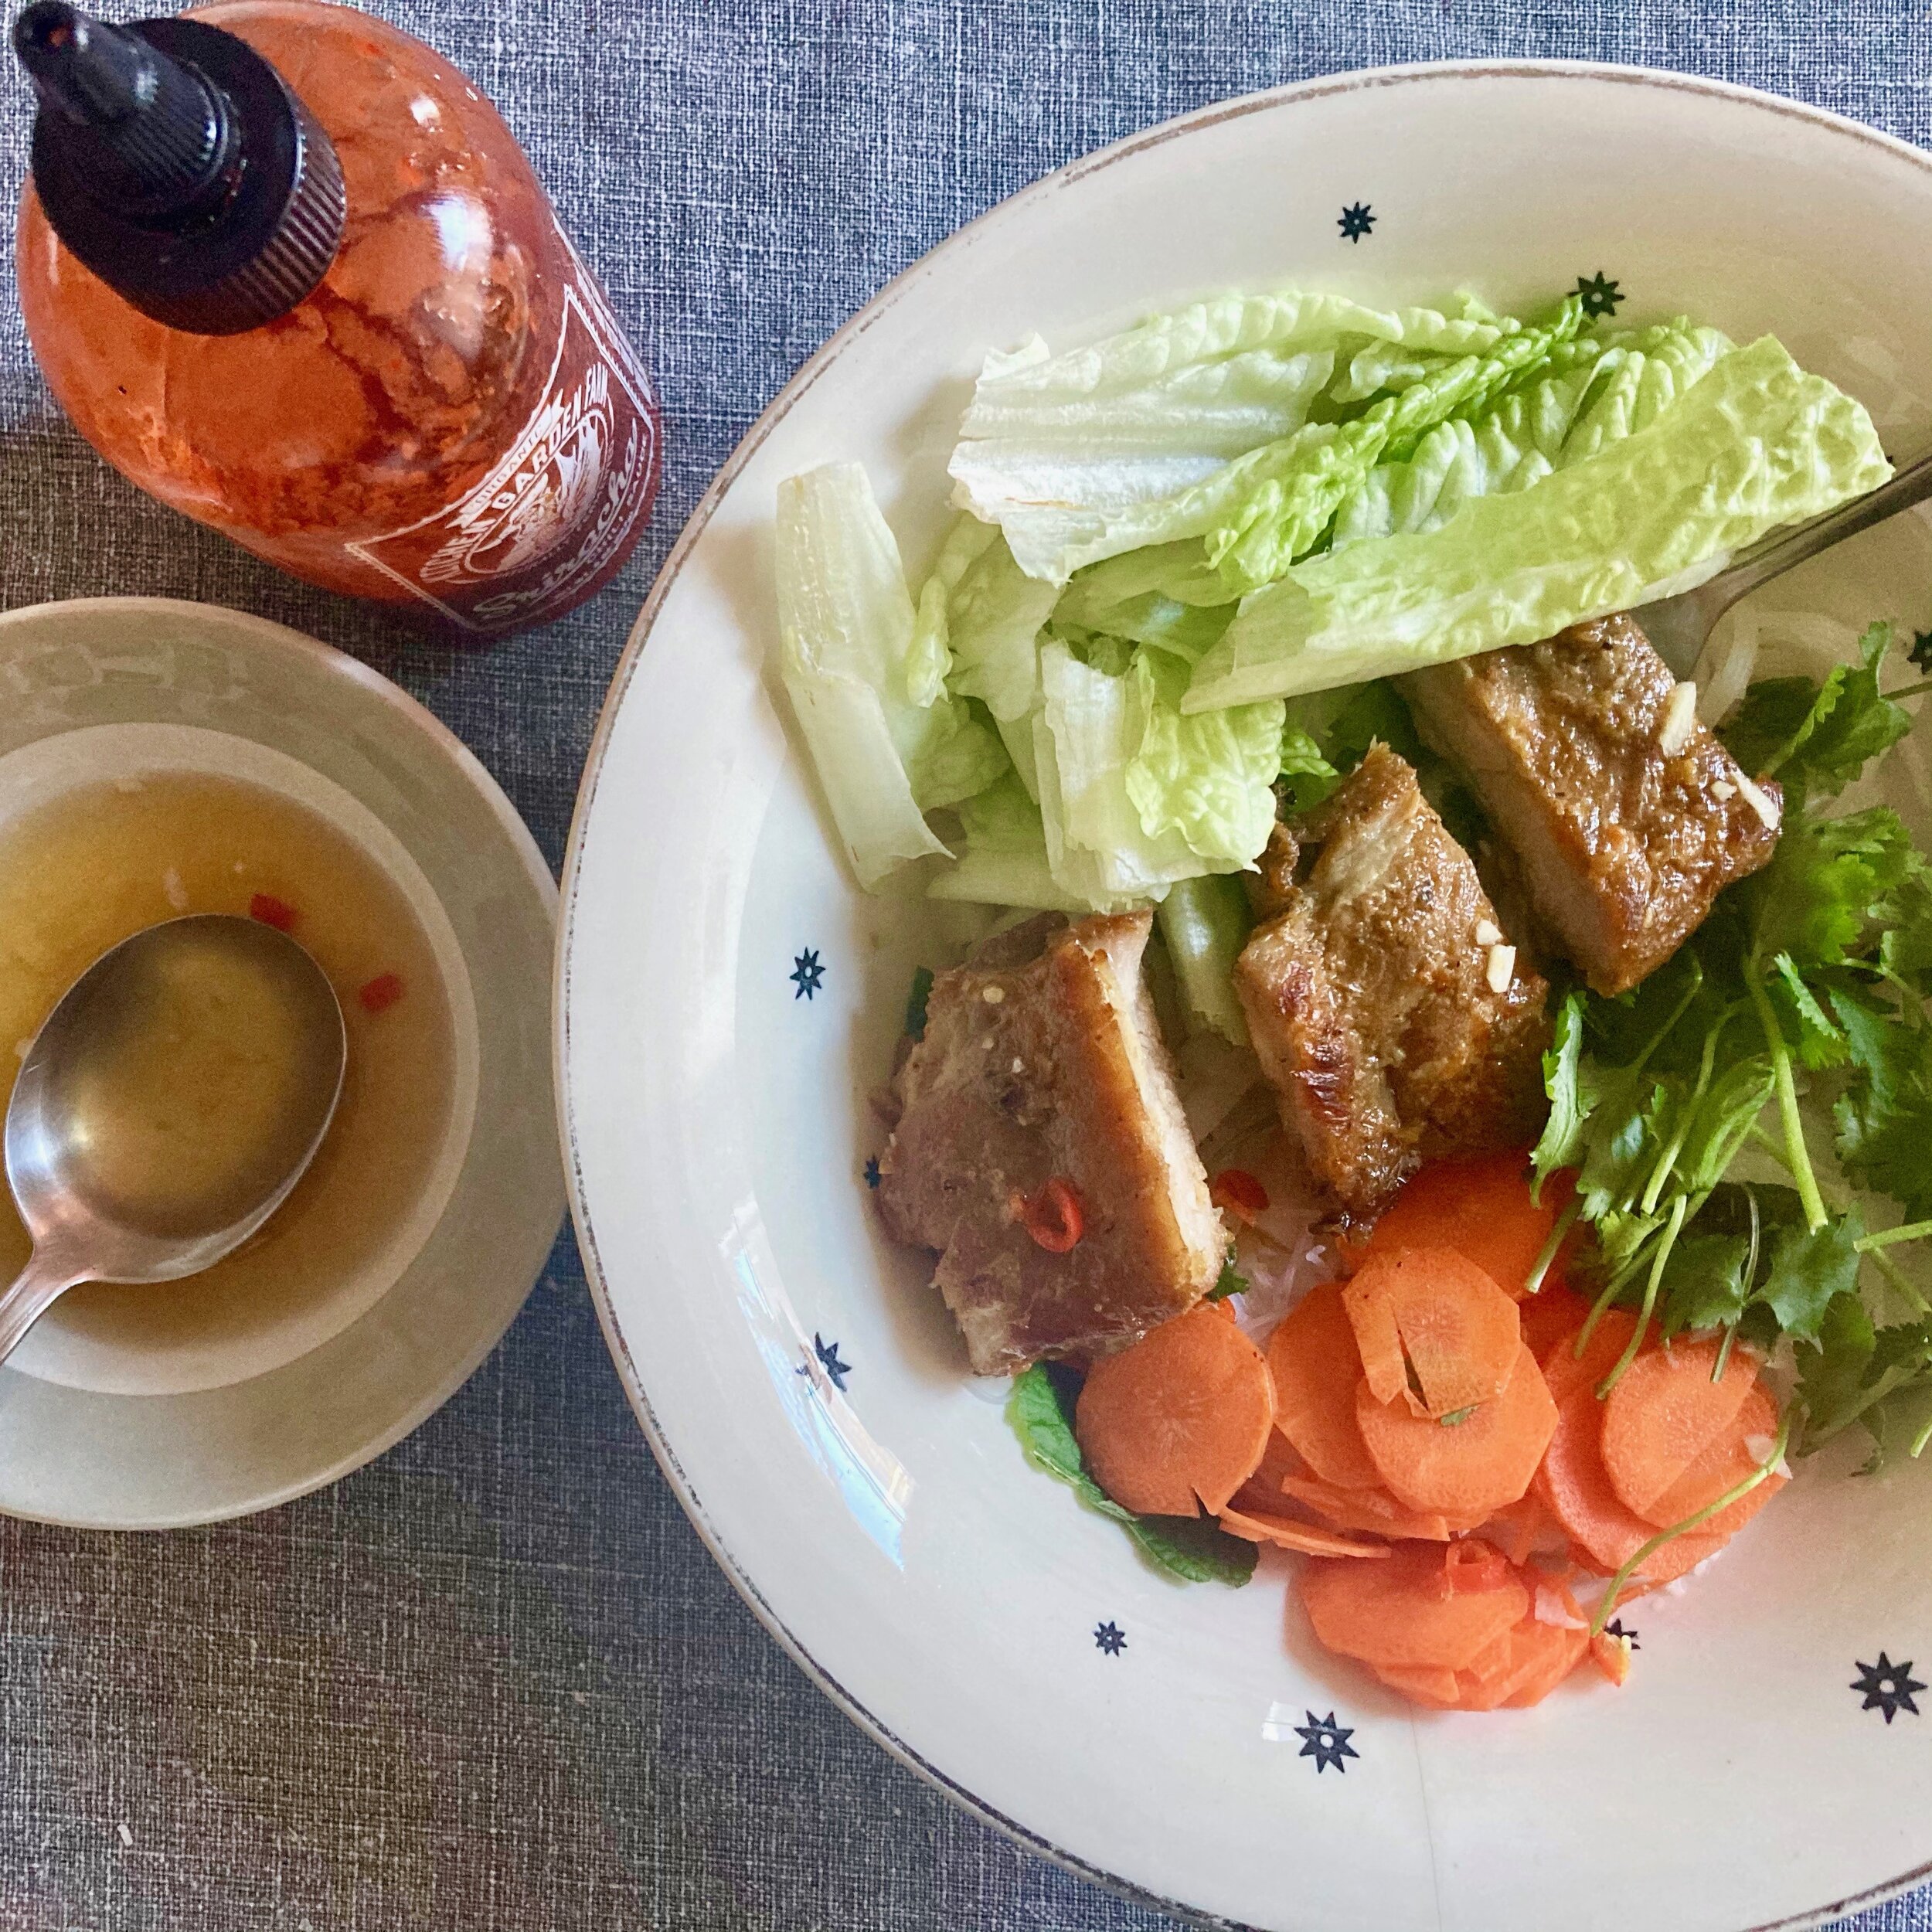
fig. b:  bbq ribs & vermicelli noodles

fig. b: bbq ribs & vermicelli noodles

I also know that when I served some of my leftover ribs over vermicelli noodles, with pickles, cucumber slices, lettuce, herbs, and nuoc cham, like some kind of Viet-style/Thai-style mash-up, it was exhilarating—easily the very best vermicelli noodle dish of its kind that we’ve ever made at home.

fig. c:  chopped rib sandwich

fig. c: chopped rib sandwich

And when I slathered a freshly-split baguette from our friends at Boulangerie Automne with parfait de volaille from our friends at Vin Mon Lapin, and then layered it with chopped BBQ rib meat, daikon and carrot pickles, lettuce, herbs (cilantro and mint), and a schmear of mayonnaise, it was the very best sandwich I’ve had in months—maybe years.

fig. d:  anatomy of a chopped rib sandwich

fig. d: anatomy of a chopped rib sandwich

So, yeah, enjoy these Thai-Style Ribs as a snack, with those ice-cold beers—by all means!—but don’t overlook their versatility.


aj


Hatch: A Plan

 
fig. a:  those other Chi Peps

fig. a: those other Chi Peps

Long-time readers of …an endless banquet will surely recall our deep, deep love for all things green chile.  Actually, long-time friends of …an endless banquet might also be familiar with our [ed:  well, Michelle’s, actually] deep, deep love of the Chi Peps—Los Angeles’s Red Hot Chili Peppers.  But here I want to address those other Chi Peps:  New Mexico’s Green Hot Chile Peppers.  

Much of that love was first inspired by a game-changing trip I paid to the Land of Enchantment back in the 1990s.  That was the first time I experienced the Cult of Green Chile full-on.  I had it on eggs, in burritos, smothering home fries, on enchiladas, and in countless other ways, for breakfast, lunch, and dinner.  The Green Chile Ritual never grew old for me, and I’ve never really shaken it.  

fig. b:  The Cult of Green Chile

fig. b: The Cult of Green Chile

In fact, I’ve been trying to replicate it, thousands of miles from New Mexico, for many years now without the benefit of the very peppers that are the essence of the Cult of Green Chile:  genuine Hatch chiles.  Not the ones that you can find in the little tin cans in supermarkets across America (although, god bless ‘em—those  do come in handy sometimes), but the entire spectrum of green chiles (mild, medium, medium-hot, hot, and extra hot) that are famously grown in and around Hatch, NM—in the southern part of the state—versions of which have been a staple of the regional cuisine for centuries.  

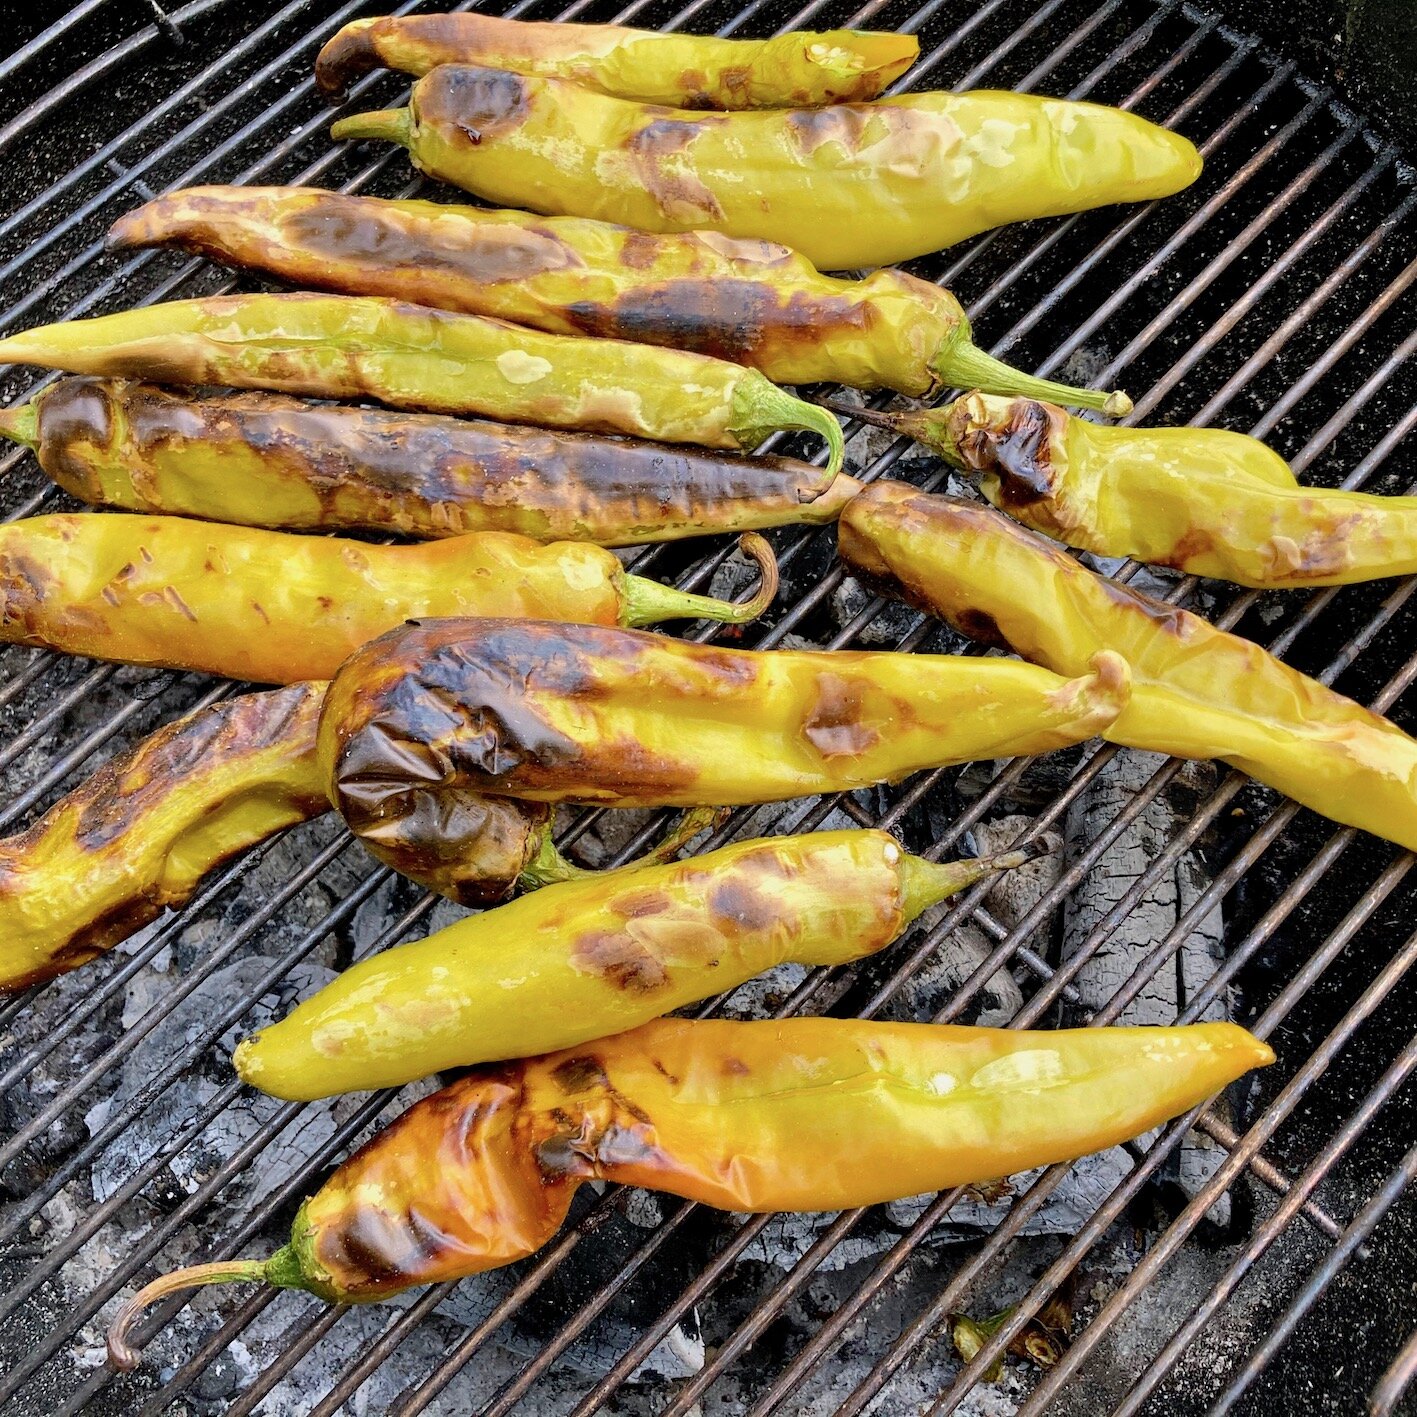
fig. c:  fire-roasted green chiles

fig. c: fire-roasted green chiles

The preferred way of preparing these treasured peppers is to roast them over a fire—traditionally, a wood fire, but these days frequently a propane flame—peel them, seed them, and then make a salsa with them.  This is the “green chile” that then appears in countless New Mexico specialties, from enchiladas to cheeseburgers, and everything in between.

In New Mexico, in the late summer and early fall, you can find makeshift chile roasting operations scattered all across the state, often in the parking lots of local supermarkets.  Your chiles are roasted before your eyes in an oversized tumbler, and a minimum order is 20 pounds of peppers.

I’ve always wanted to visit New Mexico at this time of year to witness this spectacle with my own eyes—I mean, what better time to experience the Green Chile Ritual once again? I became even more fixated on this plan after reading David Tanis’s account of his visit to Hatch and environs at the height of Green Chile Season in Saveur a few years back.  Initially 2020 seemed like it might be the year that would bring a return visit to New Mexico, just in time for the Hatch Green Chile Festival—just like Tanis—but then everything about this year changed quite drastically.

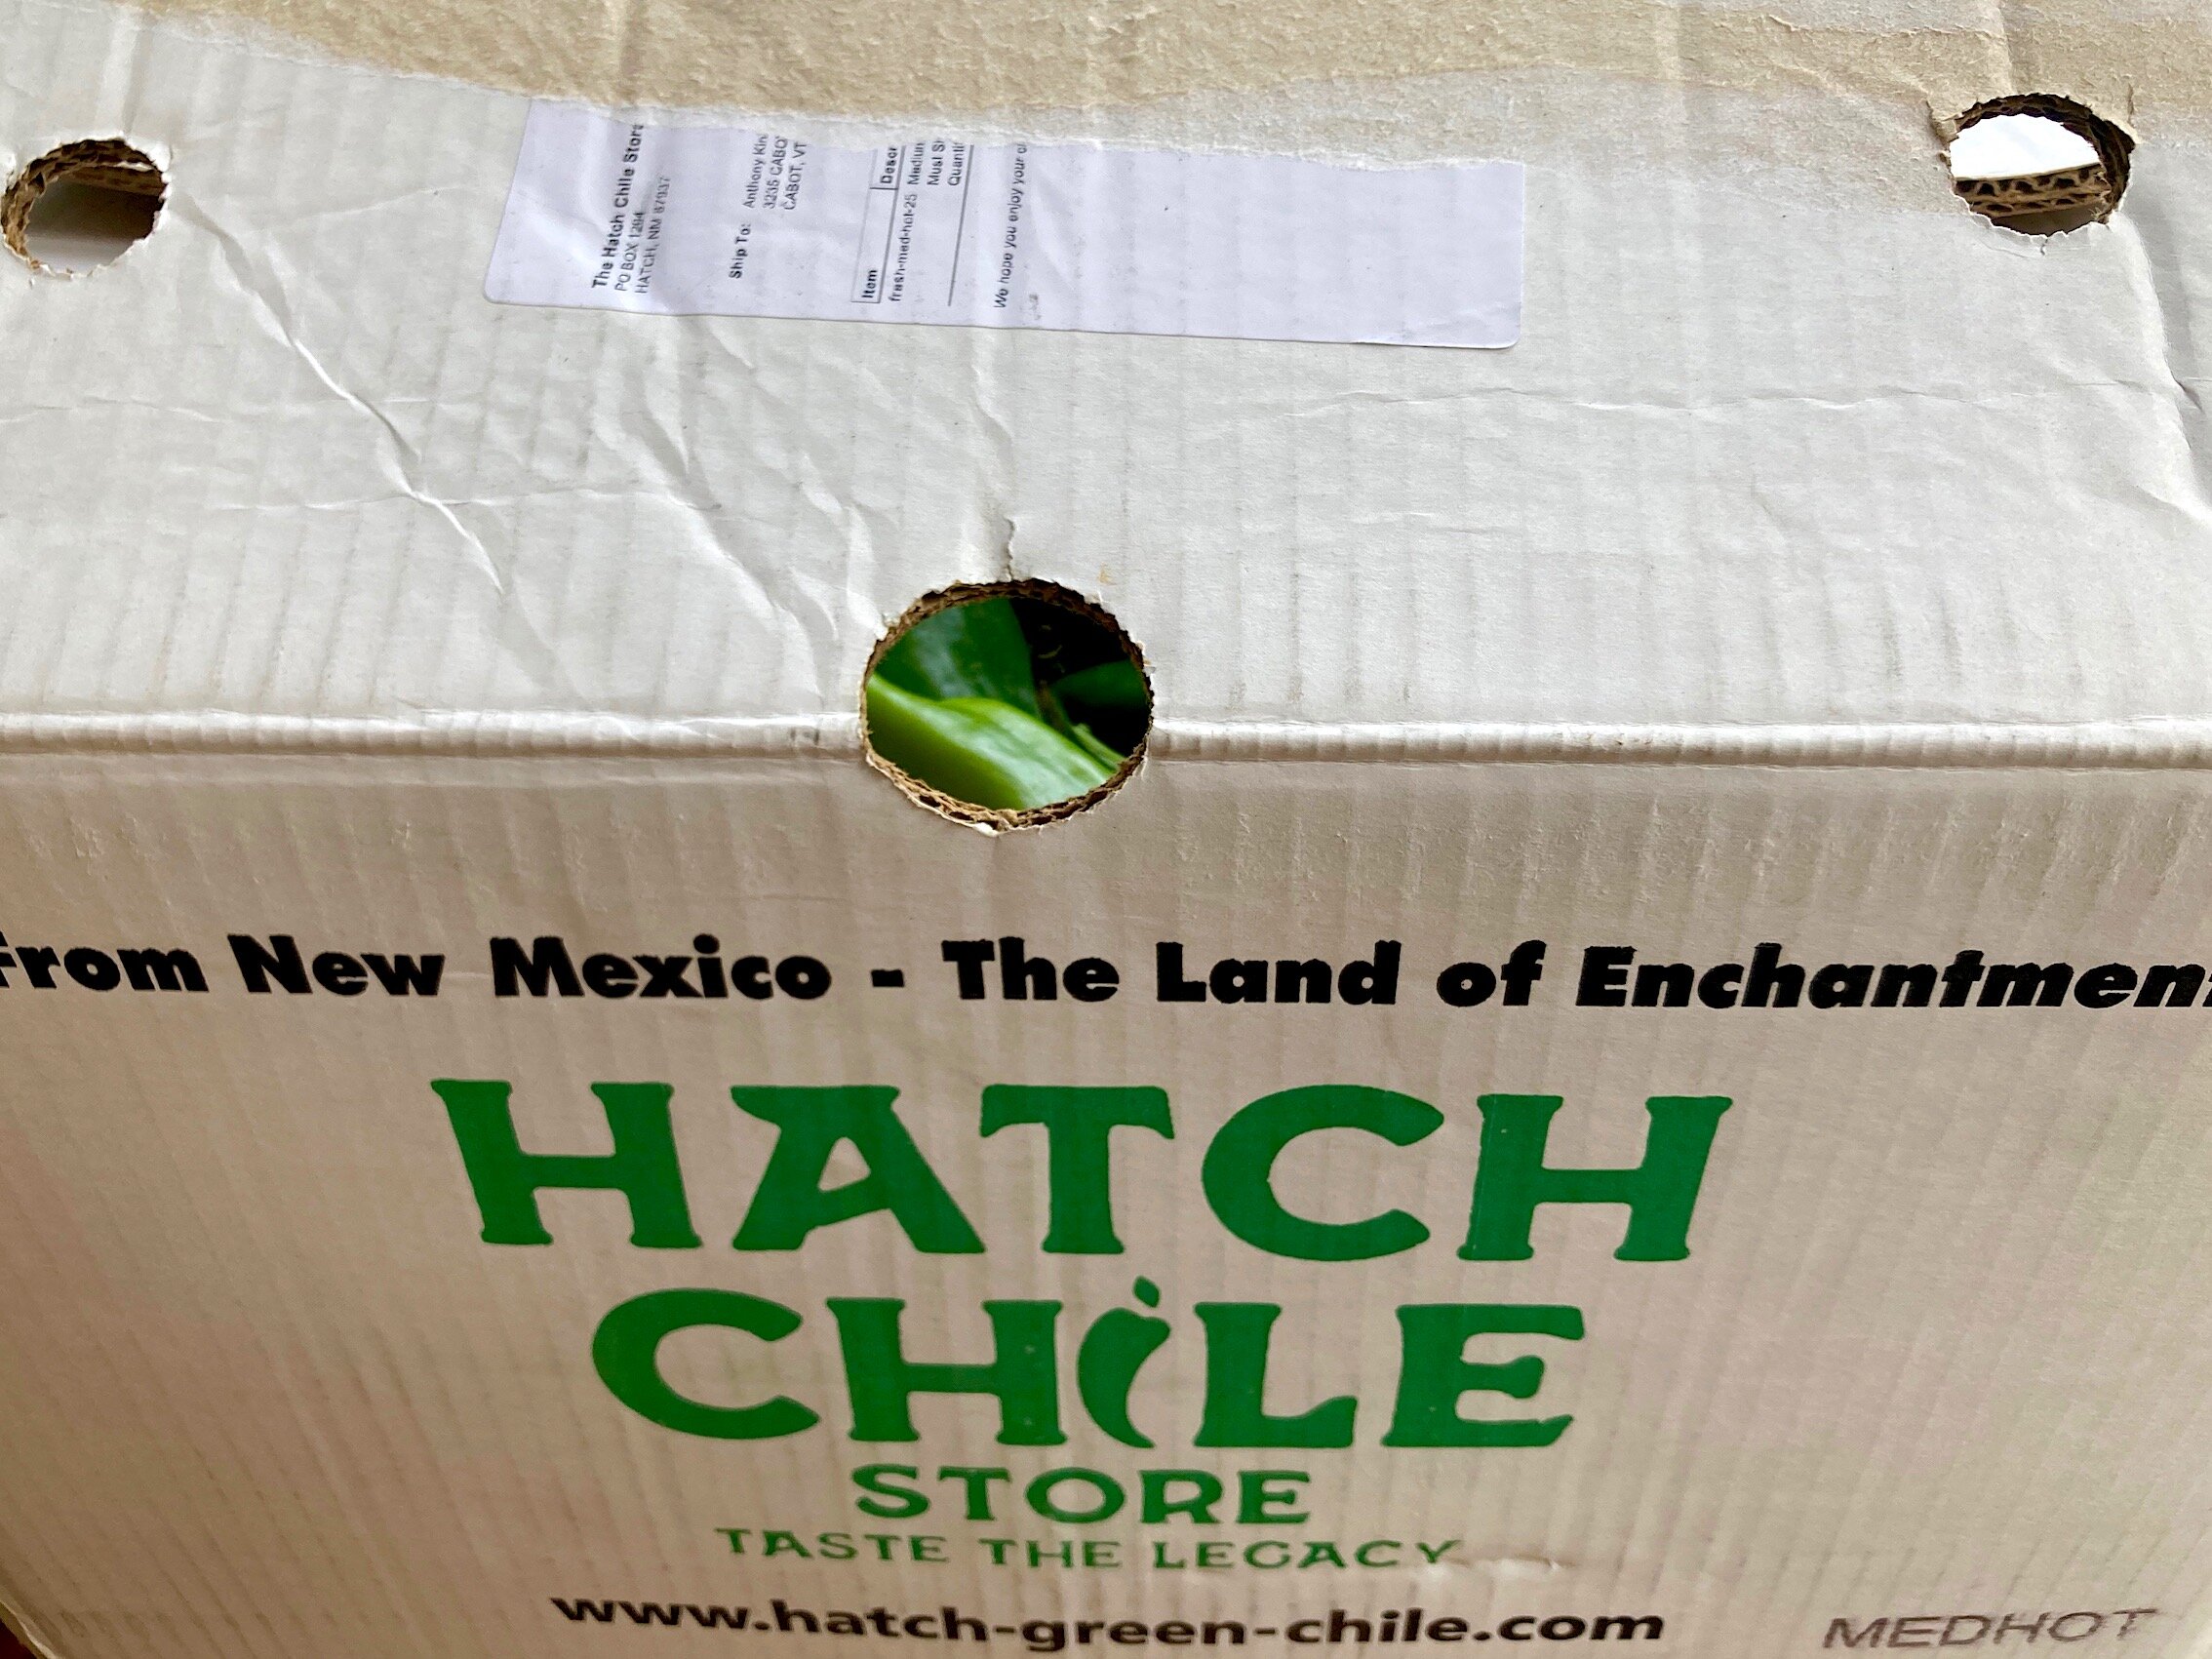
However, a few weeks ago, it occurred to me that if you can’t actually go to the festival, maybe you could try to bring the festival (or at least part of it) home.  After all, fields had been planted.  A crop was due to be harvested.  So I did the logical thing and reached out to The Hatch Chile Store, and the next thing I knew I had 25 pounds of freshly picked peppers en route to me via express delivery.

The Hatch Chile Store offers a number of different peppers to choose from—from mild “1904” chiles to extra-hot “Lumbres”—but I opted for their Big Jims.  Tanis describes this variety as, “large, fleshy, [and] moderately hot.”  I’m not sure how Big Jim feels about that, but I knew this was a popular variety—one that’s got a reputation for being particularly meaty, and particularly easy to peel (win-win).

fig. d: “large, fleshy, [and] moderately hot”

fig. d: “large, fleshy, [and] moderately hot”

Sure, you could order genuine Hatch chiles (including Big Jims) roasted, peeled, and seeded—either canned in jars, or frozen—but what would be the fun in that?  I wanted to smell that “fire-roasted green spirit” Tanis had written about.  Plus, I’ve always loved firing up the grill and roasting peppers for my improvised non-Hatch green chile concoctions—why wouldn’t I want to do the same with the real deal?  

fig. e: peek-a-boo

fig. e: peek-a-boo

That box of Big Jims showed on a Thursday afternoon.  By that evening, I’d already roasted about twenty of those bad boys, made my first batch of genuine Hatch green Chile salsa, and used it to dress a smoked pork burrito.  And by the following afternoon—using a battery of three BBQs—Michelle and I had roasted, peeled, and seeded the remaining 20+ pounds of peppers, and packed them in Ziploc bags to keep in the freezer.  

fig. f: three grill day

fig. f: three grill day

The yield is far less than 25 pounds of green chile fillets and strips, of course—the stems, seeds, and peels all weigh something, and the peppers lose some moisture in the process of being roasted.  But the chiles also gain a considerable amount of flavour in the process—and the result is simultaneously sweet, spicy, smoky, bitter, and herbaceous, and utterly addictive.

If ordering chiles online seems like too much of an ordeal (and an expenditure) for the taste of green chile, who knows?  Maybe there’s someone in your locale who’s growing some actual New Mexico chiles and bringing them to market.  If you happen to be in Montpelier, VT at this time of year, you can always drop by the farmers’ market and visit the LePage Farm stand.  You might not find 25 pounds of Hatch peppers, but you will find a basket full.

And if not, as I’ve detailed elsewhere, you can make something approaching a New Mexico green chile salsa with other more readily available peppers:  like Anaheims, Poblanos, Cubanelles, Serranos, and Jalapeños.  At the very least, you can make use of the wonderful local onions and garlic that are so plentiful in so many parts of North America right now when you do.

Green Chile Salsa

1 medium onion (preferably sweet) chopped

1 tbsp olive oil

1 clove garlic, minced

1/2 cumin seeds, toasted and ground

fire-roasted green chiles

tomatillos (optional)

chicken broth or water

1 tsp masa harina

salt and pepper to taste


Sauté your onions in the olive oil until nice and soft.  Add your chopped garlic and some toasted and ground cumin seeds.  Add your roasted green chiles, some tomatillos, if you're using them, and your chicken broth.  Be judicious with your use of liquid (chicken stock or water).  You don't want to add too much, but the idea here is to add enough that you can cook your sauce down, uncovered, reducing it into a thing of beauty.  This shouldn't take all that long.  No more than about half an hour, if you've added the right proportion of broth/water.  And keep in mind that if you’re using tomatillos, they will give off quite a bit of liquid. If you go that route (and it’s a wonderful path to take), it’s up to you to decide what your ratio of green chiles to tomatillos should be, but I would recommend about 3:1 (e.g., 1 1/2 cups of green chile strips and 1/2 cup of tomattilos). Any more and you’re really making a salsa verde, and not a green chile. Add a sprinkle of masa harina toward the end of this process if you'd like to thicken your sauce further and give it a bit of depth.  The goal here is to create a fairly thick, chunky sauce that will be ideal for everything from dipping chips into to dressing a burger.  And, like I said, it ought to taste like a thing of beauty, too.

This is another absolute classic, and one that was hugely inspired by a recipe from David Tanis’s A Platter of Figs And Other Recipes. Respect is due!

Green Chile Stew

5 pounds well-marbled boneless pork butt, cut into 2-inch cubes
salt and pepper
2 tbsp vegetable or olive oil
2 large onions, finely diced
4 to 6 garlic cloves, chopped
2 tsp cumin seeds, toasted and finely ground
1/2 cup chopped tomatillos, fresh or canned
6 large carrots, peeled and chunked
1 cup chopped roasted green chiles*
1 tbsp masa harina
8 cups water or chicken broth
chopped cilantro
hot corn or flour tortillas, to serve

Season the pork with salt and pepper.  Heat the oil in a large Dutch oven or other heavy-bottomed pot.  Add the meat, in several batches, without crowding, and brown it lightly.  Transfer to a platter or tray. 

Add the onions to the pot and brown them.  Add the garlic, cumin, tomatillos, carrots, and green chiles, then sprinkle the masa harina over and stir.  Salt the mixture, then return the browned meat to the pot and stir well.  Cover with the broth and bring to a boil. 

Cover the pot, turn the heat to low, and simmer gently for 2 to 3 hours—until the pork is tender and shreds easily. 

Taste the broth and adjust it, adding salt or more green chile as necessary.  The broth should be well seasoned and fairly spicy.  Simmer for another 30 minutes or so, until the pork is exceedingly tender. Skim any fat from the surface of the broth. 

Let the stew rest for an hour or more.  Refrigerate overnight if desired (this allows the flavours to meld even more). 

To serve, reheat the stew and ladle into warmed bowls.  Sprinkle with chopped cilantro and accompany with hot tortillas. 

Serves 8 to 10. 

* Tanis notes that it takes about 12 large fresh chiles to produce 1 cup of chopped roasted chiles.  It's preferable to grill them over an open fire, but you can also blacken them under the broiler or directly over a gas burner, in a pinch.

Green Chile Stew is quite literally a dish that makes people crazy. I’ve seen it happen. People go back for 3, 4, 5 helpings if you’re not careful. Be careful. You’re going to want some leftovers. Trust me.

aj

Make Mine a B.L.T. (or even "just" an L.T.), or In Praise of the B.L.T. (and the L.T.)

 
fig. a:  Can you see where this is going?

fig. a: Can you see where this is going?

We love sandwiches of all kinds, of course—lobster rolls, hoagies, smoked meat, club, po’ boys, muffulettas, chopped rib, falafel, burgers, even the lowly P.B. & J.—but there’s one sandwich that stands above them all at this time of year, when tomatoes are plentiful and at the peak of perfection, and that’s the B.L.T.

All the constituent elements of the B.L.T. serve their purpose and hold importance—including the bread, mayonnaise, bacon, and lettuce—but as far as we’re concerned the very most crucial ingredient is the tomato. If you don’t have a perfect tomato to start with, really, what’s the point? You could make the most beautiful mayonnaise from scratch, fry up the smokiest, most delicious artisanal bacon, source the sweetest, most tender-crunchy lettuce leaves, and even bake the most perfect sandwich bread imaginable (or find it at your local artisanal bakery), but if the tomato was unripe and tasteless, the whole contraption would fall apart.

Lucky for us, we’ve been able to score loads of beautiful, juicy, ripe local tomatoes recently, we have access to our favourite Northeastern bacon (North Country Smokehouse, out of Claremont, New Hampshire), and we’ve even been able to find local, organic iceberg lettuce—in other words, the B.L.T. trifecta. We’re a little less obsessive when it comes to the bread and mayonnaise. We bake plenty of our own bread and make our own mayonnaise with regularity, but we’re perfectly fine with using supermarket brands when it comes to these two elements. Recently, we’ve been fond of using Hellmann’s mayo and Pepperidge Farm’s Butter Bread or Honey White.

But it’s the tomato we’re most particular about. And right now, my favourite B.L.T. tomato is an heirloom variety known as the Paul Robeson.

fig. b: Paul Robeson puts on quite a show

fig. b: Paul Robeson puts on quite a show

The Paul Robeson is a variety of Russian origin that was named in honour of the African-American singer, actor, and activist—”a sandwich tomato with a tang, an extraordinary tomato for an extraordinary man,” as the folks at Fedco Seeds put it.

You don’t have to use an heirloom variety, of course, but for a true B.L.T., it’s imperative to use a big, juicy, supremely tasty slicing tomato. Delicious cherry tomatoes will do in a pinch, but for the full effect, it really has to be a slicer that’s just bursting with juicy goodness. All the greatest sandwiches are messy affairs—or at least they should be—and the B.L.T. is no exception. Your plate should be a glorious mess when you’re done. Napkins and paper towels should be an absolute necessity. Possibly even a shower.

Lastly, the bread must be properly toasted. It should be slathered with mayonnaise. (I’m a strong proponent of mayonnaise being slathered on both slices of toast.). And it’s absolutely obligatory that the tomatoes be salted in advance of sandwich construction. Okay, maybe it’s not “obligatory,” especially if you’re using a salty bacon, but, personally, I think the salt really helps release the tomato’s full range of flavours.

Now, as much as I love a true B.L.T. made with excellent bacon, we don’t always have bacon around. In fact, most of the time we don’t. Mostly it’s reserved for “special occasions.” But that’s okay, because if the tomatoes are exceptional, I get nearly as excited about an L.T. sandwich as I do about a B.L.T. And that’s actually the sandwich we have with the greatest frequency during peak tomato season. (If you’re really missing the salt & smoke of those crispy bacon slices, you could always sprinkle a little smoked salt on your tomatoes in place of your usual sea salt or kosher salt. You won’t get quite the same texture, and you won’t have the intoxicating presence of bacon fat adding to the alchemy, but at least you’ll get some of that smoky saltiness.)

And while I’m a big fan of mayonnaise, and I realize it’s almost heretical to say so, I’m also perfectly fine with a mayo-less L.T. sandwich made with a vinaigrette—as long as the tomatoes are excellent.

But the version I love the most is that classic version—the one with the perfect tomatoes, the choice bacon, and the proper lettuce, bread, and mayonnaise combo. Especially if it’s served sliced on the bias.

fig. c:  B.L.T. lunch

fig. c: B.L.T. lunch

Preferably with a cold beverage and some potato chips.

One friend who joined us for a socially distanced B.L.T. lunch earlier this summer called the A.E.B. version “the Platonic ideal of the B.L.T.” The last time Michelle finished one, she just said (in typical Michelle fashion), “Man, that was really, really good.”

All I know is that this is the meal that I crave the absolute most right now. I’ve been having at least four B.L.T. and/or L..T. sandwiches per week for the last several weeks now (usually L.T.s, actually), and each and every one has been just as satisfying as the last. Usually more so.

aj

Out of the Archives 4: Eat Your Greens, pt. 2

Here's another must-read/must-see/must-try from the archives.  It first appeared 5 years ago to the day, on November 13, 2010.  As was the case in 2010, now's the time--there are plenty of green tomatoes around, and you can often get them for a song.

fig. a:  time to fry

fig. a:  time to fry

There are still some real green tomatoes kicking around. In fact, depending on where you live, there might still be loads of them. And, along with making your own chowchow, frying them is a pretty great way to make use of the last of the tomato harvest. But even if you find that the green tomatoes in your area have already disappeared, all is not lost. As the Lee Bros. point out, your standard supermarket tomato is effectively a green tomato--it certainly was picked green (generally, very green). So you may need to add a bit of lemon juice and some salt to your sliced supermarket tomatoes to coax out a little flavor and approximate the wonderful, citrusy tartness of a true green tomato, but fried green tomatoes are a classic Southern side that you can make pretty much all year long. If you want to make the real deal, however, and I strongly advise giving them a try, local green tomatoes were still available here in Montreal this week. And their bright, tangy flavor this late in the year made it feel like we were cheating the approach of winter somehow. If only for a moment.

Note: you also need some decent cornmeal to make these fried green tomatoes, and good cornmeal can be hard to find in the Montreal region. The best brand we've been able to locate around here is Indian Head Stone Ground Yellow from Maryland, available at Aubut

fig. b:  B Bros.

fig. b:  B Bros.

Even better is Beattie Bros., which is owned by the same parent company, but produced in North Carolina. Though, as far as we know, you can only get Beattie Bros. in the States.

Fried Green Tomatoes

3 lbs green tomatoes
3 large eggs, beaten
3/4 cup whole milk
3-4 cups peanut oil
3 batches fry dredge (recipe follows)
kosher salt, if needed
lemon juice, if needed

Core the stem ends of the tomatoes and slice them in 1/4-inch slices. Set aside. Whisk the eggs and milk together in a broad, shallow bowl.

Pour the oil in a 12-inch or 14-inch skillet (3 cups of oil will suffice for the 12-inch skillet; 4 cups should do for the 14-inch skillet, and the 14-inch skillet will make the task of frying 3 lbs of tomatoes much, much faster--ultimately, whatever size skillet you use, you need an oil depth of about 1/3 of an inch). Heat the oil over medium-high heat until the temperature on a candy thermometer reaches 350º-365º.

Heat the oven to 225 degrees. Set a baker's rack on a cookie sheet on the top rack.

Divide the dredge between two small bowls or shallow baking pans. Taste the tomatoes. "They should have a bright tartness like citrus fruit." If they don't, sprinkle the slices with salt and lemon juice (if you're using supermarket tomatoes, this additional lemon and salt will be necessary). Press 1 tomato slice into the first bowl of dredge on each side, shaking any excess loose. Dunk in the egg mixture, then place in the second bowl of dredge, coating both sides, and shaking any excess loose, before placing the slice on a clean plate. Repeat with more slices until you've dredged enough for a batch (roughly 8-10, if you're using the 14-inch skillet). With a spatula, gently transfer the first batch of slices into the hot oil, taking care not to create splatter, and making sure your temperature continues to hover between 350º-365º.

As the first batch cooks, dredge the second batch according to the directions above, while keeping a watchful eye on the first. Once the slices have fried to a rich golden brown on one side, roughly 2 minutes, flip them carefully and fry for another 2 minutes or so, or until golden brown. Transfer the fried tomatoes to a plate lined with a double thickness of paper towels and leave them to drain for 1 minute.

Transfer the slices to the baker's rack in the oven, arranging them in a single layer, so they remain warm and crisp. Repeat with the remaining slices until all the green tomatoes have been fried. Serve hot with Buttermilk-Lime Dressing (recipe follows).

All-Purpose Dredge

1/2 cup all-purpose flour
3 tbsp stone-ground cornmeal
2 tsp salt
1 1/2 tsp freshly ground black pepper

In a medium bowl, sift the flour, cornmeal, salt, and pepper together twice. Stir. Use as directed.

This is a great all-around frying dredge. The Lee Bros. use this very recipe for everything from chicken, to fish, to fried green tomatoes.

Buttermilk-Lime Dressing

3/4 cups whole or lowfat buttermilk (preferably the former)
5 tbsp freshly squeeze lime juice
2 tbsp extra-virgin olive oil
1 tbsp honey
1/2 cup finely minced basil
1/4 cup finely minced green onions
1/4 cup finely minced parsley
1/2 tsp salt, plus more to taste

In a small bowl, whisk the ingredients together until thoroughly combined. Cover tightly and store in the refrigerator not more than 2 days.

[these recipes are based very, very closely on ones that appeared in The Lee Bros. Southern Cookbook]


These fried tomatoes make for a fantastic side with any number of dishes, Southern or otherwise. We love 'em with seafood, but then we've been known to have them with barbecue too, and I could easily imagine having them as part of a Thanksgiving dinner. Leftover fried green tomatoes taste pretty outrageous on top of a leftover pulled pork sandwich, too. Especially if you drizzle a little of that Buttermilk-Lime Dressing on top. Just take a look:

fig. c:  deluxe pulled pork sandwich

fig. c:  deluxe pulled pork sandwich

Oh, and speaking of Thanksgiving and the Lee Bros.: if you haven't had the pleasure of reading Matt and Ted's New York Times exposé on Marilyn Monroe's stuffing recipe from 1955-6 (as it appears in Fragments, a just-published collection of previously unreleased Monroe ephemera), you really should. Not only is it a great read, but Marilyn's recipe is both mysterious (ground beef? Parmesan? City Title Insurance Co.?) and tantalizing. Just look at that picture. Just look at that recipe

aj

p.s. Looking for "eat your greens 1"? You can find it here.

Apple Season, pt. 1: apples & chorizo

 
fig. a:  autumn still life, Vermont

fig. a:  autumn still life, Vermont

It may be better known for its dairy and its maple syrup, but if you're an apple lover--and I most definitely am*--Vermont stands out as a true Apple Paradise even in a region that's famed for its prodigious apple harvests (think Quebec, think New York, think Ontario).  

For a relatively small state, with a very small population, Vermont produces a lot of apples.  But even more impressive is the sheer variety of apples that are on offer at your local orchards, at your local farmers markets, and at your local co-ops.  Check out the Onion River Co-op (a.k.a., City Market) in Burlington, or the Hunger Mountain Co-op in Montpelier if you really want to see an astounding selection of apples.  Look for apples from Champlain Orchards or, better yet, Scott Farm, whose orchards are managed by a legendary orchardist named Zeke Goodband who hosts an annual Heirloom Apple Day every October over Columbus Day Weekend, drawing generously from the 110+ varieties (!) they produce.**

 Hunger Mountain Co-op alone carries upwards of 20 different varieties of Scott Farm heirlooms at this time of year, in addition to a wide selection of non-heirlooms, like McIntoshes, Macouns, and Paulareds.  Some of our favourites include Cox's Orange Pippin, Esopus Spitzenburg, Fameuse (the "famous" heirloom varietal of Quebec, and one that happens to be notoriously difficult to actually find in Quebec), Ashmead's Kernel, Northern Spy, and Belle de Boskoop, which may just be the ultimate apple for strudel and apple pie (Michelle certainly seems to think so these days).

fig. b:  apples of uncommon character

fig. b:  apples of uncommon character

And if you'd like some help making sense of this cornucopia (we certainly did), there's no better guide than Rowan Jacobsen's Apples of Uncommon Character:  123 Heirlooms, Modern Classics, and Little-Known Wonders (Bloomsbury, 2014).  As it turns out, Jacobsen lives in Washington County, Vermont, not far from our place, but we fell in love with his book before we knew that, and months before we actually got to know him and his family.  

On some level, Jacobsen is a product of Vermont's apple obsession, as is his book.  Jacobsen is an authority on the subject, and an amateur orchardist himself.  But he also had access to a wide range of local and regional expert (including Goodband) when he was researching this book, and he didn't have to venture far to find most of the 123 varieties that Apples of Uncommon Character features.  

In any case, Jacobsens's book is both fascinating and incredibly informative, and its categorizations (which varieties appear early?  which are the best for baking?  which make the tastiest cider?  which keep the best in your cellar? etc.) are terribly useful for people like us who use apples in a wide variety of preparations (pies and desserts, soups and savoury dishes, preserves and pickles, salads, etc.).  It's also beautifully written for a book that's essentially a field guide, not to mention lushly illustrated.  And if all that wasn't enough, it ends with 20 sweet and savoury recipes, many of which are of an uncommon character themselves.

fig. c:  the spy that came in from the cold

fig. c:  the spy that came in from the cold

One of our absolute favourites from this book is a recipe that works particularly well with a somewhat tart apple, like a Northern Spy.  It's Jacobsen's take on a classic dish from Asturia--Spain's famed cider-producing region--and one that is testament to the ages-old, but still passionate love affair between apples and pork:  Chorizo with Apples.  It only takes minutes to make, and it's insanely delicious.  The addition of apple cider, makes the end result "more apple than apple."  The combination of the warmth of the paprika, the sweetness of the apples and onions, the olive oil, and the pork fat makes for an utterly seductive sauce that you'll want to sop up every last drop of.

fig. d:  apple hearts sausage

fig. d:  apple hearts sausage

Chorizo with Apples

1 Tbsp olive oil

1 lb chorizo (preferably a high-quality Spanish version), cut into half-inch slices

1/2 onion, sliced

1 cup dry hard cider

1 apple (preferably something a little on the tart side, like a Northern Spy), cored and sliced

parsley for garnish

Heat oil in a skillet, add chorizo and sauté until brown. Turn and brown the other side.

Add onion and cider, cook 6 minutes, stirring occasionally.

Add apple and cook another 6 minutes, stirring, until sauce is thick.

Garnish with parsley and serve with a crusty loaf of bread, the better to sop up all that beautiful sauce with.  

This dish is a perfect fall appetizer, especially served with a crisp hard apple cider or a crisp white wine on a crisp autumn evening.  Lay it out with some sliced sourdough bread, a plate of mixed olives, and a small cheese plate, and your meal will be off to a fantastic start.

¡Salud!

aj

* At this time of year, when the apples are particularly fresh and crispy, it's not uncommon for me to eat 4 or 5 in a row after dinner, in addition to the 2 or 3 apples I might have at other times over the course of the day.  

** We were so blown away by the Scott Farm apples we tried last fall, that this spring we took a pruning and grafting workshop with Mr. Goodband in the very early spring, when southeastern Vermont was still blanketed in snow.  This being Vermont, not only was our workshop leader named Ezekiel "Zeke" Goodband, not only did he sport a beard worthy of the Old Testament, but his pruning and grafting lessons were delivered in the form of anti-capitalist parables.

fig. e:  Grafting by Goodband

fig. e:  Grafting by Goodband

Lo and behold, a few months later, our apple trees blossomed in a way they hadn't in years.

fig. f:  spring blossoms

fig. f:  spring blossoms